Recent Stories
-
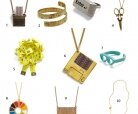
10 ModCloth Accessories For The Creator's Soul
-

Heart Rate Workouts That Make Time On The Treadmill Fly By
-
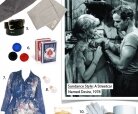
Sundance Style III: A Streetcar Named Desire
-

Me Oh My! You Are Sweeter Than Pie: DIY Mailable Mini Chess Pies
-

Moonshine Cherries & Bacon Frosting: 10 Valentine’s Gifts For Dudes
-

Go Mini For The Big Game, Menu #1: Super Sliders
Filtered by: Living / An Easy, Beautiful Gift That Will Leave Them In Stitches
15,
2011


I was invited to a house warming party last weekend for some friends of mine that had just moved to San Francisco. I knew I wanted to make them some delicious treats, but I also wanted to find a creative way to truly welcome them to the city. So, I did both at once.
Materials:
- Box of your choice. I used a craft box like this that costs me $3-4 dollars, but you could even use a spray painted shoe box or shipping box if that’s the only thing around your house.
- Seam ripper, or tool for poking holes.
- Thread
- Needle
- Removable tape
- Treats and tissue paper, if filling box. I baked and frosted cookies, and had lots of frosting leftover, so I drizzled it on top of some Pretzel Crisps for a salty/sweet mouth explosion.
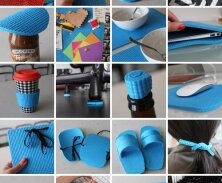
Instructions
- Bake treats, if you are so inclined. Purchased treats work well, too.
- From your computer, type and print whatever word or phrase you want in whatever font you want. Note that cursive fonts enable you to continuously stitch. Otherwise, you will have to tie knots and re-start your stitched for each letter. Be sure that the width/height of your text will fit on your box.
- Cut out your text and use center it on your box (tip: if you have it, use removable tape to ensure paper doesn’t move around - otherwise, just keep paper pressed while you poke holes).
- Using the top of your seam ripper, poke holes through your box, tracing along the lines of your word or phrase. I poked holes every 2-3mm or so. The tighter your spacing, the more clear your word comes out, but also the longer to stitch.
- Remove your paper
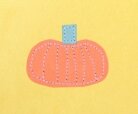
- Thread your needle and start stitching back and forth through the holes. You’ll notice there are gaps in between each hole - that’s because you have to go over the letters twice. I did the entire word, “Welcome” and then, starting at the “e”, stitched it again backwards. (If your thread gets too short during the process, just tie a knot on the hidden side of the box, thread a new needle, and pick up where you left off.)
- Fill your box with tissue paper and treats, and you’re all set to impress!
This could obviously be used for many occasions - birthdays, holiday gifts, etc. It could also be made into a personal box you use to store things around the house. I’m thinking of using these mini boxes to store odds and ends like hairbands, paperclips, etc. Use your own creativity and have fun!
You might also like
-

IXXI is the Easiest Way To Customize Walls With Your Own Designs
-
Creating Your Own Stitched Stationary
-
Moonshine Cherries & Bacon Frosting: 10 Valentine’s Gifts For Dudes

I help people discover innovative products and ideas to live more simply, beautifully, and creatively. Read more.
GET IDEAS IN YOUR INBOX