Recent Stories
-
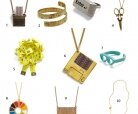
10 ModCloth Accessories For The Creator's Soul
-

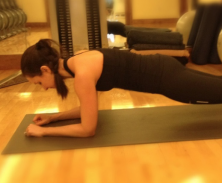
Heart Rate Workouts That Make Time On The Treadmill Fly By
-
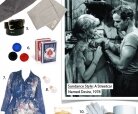
Sundance Style III: A Streetcar Named Desire
-
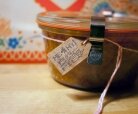
Me Oh My! You Are Sweeter Than Pie: DIY Mailable Mini Chess Pies
-
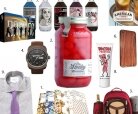
Moonshine Cherries & Bacon Frosting: 10 Valentine’s Gifts For Dudes
-

Go Mini For The Big Game, Menu #1: Super Sliders
Filtered by: Style / DIY Fabric Button Earrings
10,
2011

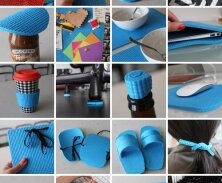
I about died when I realized how easy it was to create personalized earrings out of buttons. (If you haven’t noticed yet, I tend to swoon over any normal product that can be transformed into something more interesting.)
I made these button earrings as thank you gifts for a few of the wonderful women who planned my bridal shower a couple of months ago. The best part was that it only cost me about $15! (Well, and time, of course.) To add a “meaningful touch”, I even used some extra tulle that came with my wedding dress to cover the fabric and add to the earrings. You can do the same thing with any fabric that speaks to you. Here’s the step-by-step process:
Materials:
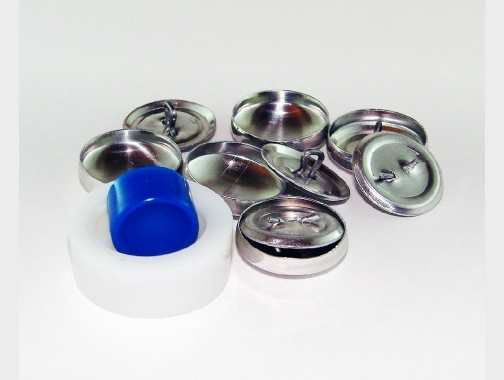
- Dritz Aluminum Cover Button Kits-Size 30 3/4 Inch ($5) - The 3/4” is just what I used - you can get whatever size you want.
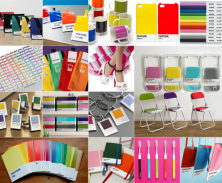
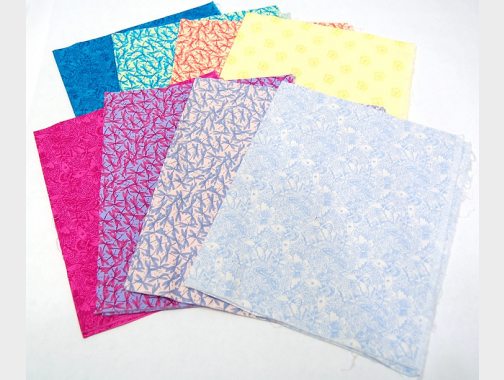
- Fabric of your selection (<$5) - I recommend using fabric swatches if you don’t have any on hand - they are cheap and you don’t need much anyway. Also, use a thin-ish fabric like cotton or satin (no leather, etc) or it will be much more difficult to get your button to clasp. >
- Scissors - hopefully, you already have these :)
- Steel Glue On Earring Posts ($3)
- Super Glue ($3)
- Pen or pencil - Again, you should have these.
Are you ready for how easy this is? Brace yourself…
- Prep your buttons by removing the hook on the back. I found that I could just twist it a lot and it would eventually come off. You could also use wire cutters or scissors.
- With a pencil, draw circles on your fabric that extend about 3/4” wider than the diameter of your button. So, if you use the 3/4” button, measure a 1 1/2” diameter circle. I found a water bottle cap that was about the right size to stencil around - just look around your kitchen for something round - I’m sure you’ll find a good stencil. Sizes are approximate.
- Cut out the circles from your fabric.
- Center the fabric over the top (rounded side) of your button and press down into your button cover tool. (There are illustrated instructions for doing this on the box of the button cover kit.)
- Wrap the leftover edges of fabric on the backside of the button, then push the button bottom into place. (You should still be using the button cover tool.) Your covered button has been made.
- To make into earrings, just glue the earring posts onto the back of your button.
- If giving as a gift, you can make a cute earring holder like the one featured above. I used cardstock, printed a message (I couldn’t resist the “Cute as a button” line), cut and glued a strip of burlap, then poked the button earrings through.
Finally, I tied a bow with twine. So simple! Don’t you just love crafts that are both beautiful and simple?
PS: If you are a guy reading this and you have a girlfriend/wife/sister/mom/grandma (you get my point), I swear she will go absolutely crazy if you make her these. It is easy and takes 10 minutes. Score some points, dude :)
Feel free to hit me up on if you have questions. Have fun making!
You might also like
-

10 Festive Holiday Aprons To Rock In The Kitchen
-
9 Creative Wearables For The Holidays
-

Sundance Style II: The Big Lebowski

I help people discover innovative products and ideas to live more simply, beautifully, and creatively. Read more.
GET IDEAS IN YOUR INBOX